
How to create your Stripe Connected Account
Step-by-step instructions to complete Stripe Express onboarding, add your identity details and bank account, and activate your payouts as a seller on Cardora.
What you will need
- An email address to use for Stripe Express
- Your mobile phone, to receive the SMS verification code
- An identity document (ID card or passport) and a phone with a camera
- The IBAN of a bank account you are entitled to manage
The process at a glance
Step 01
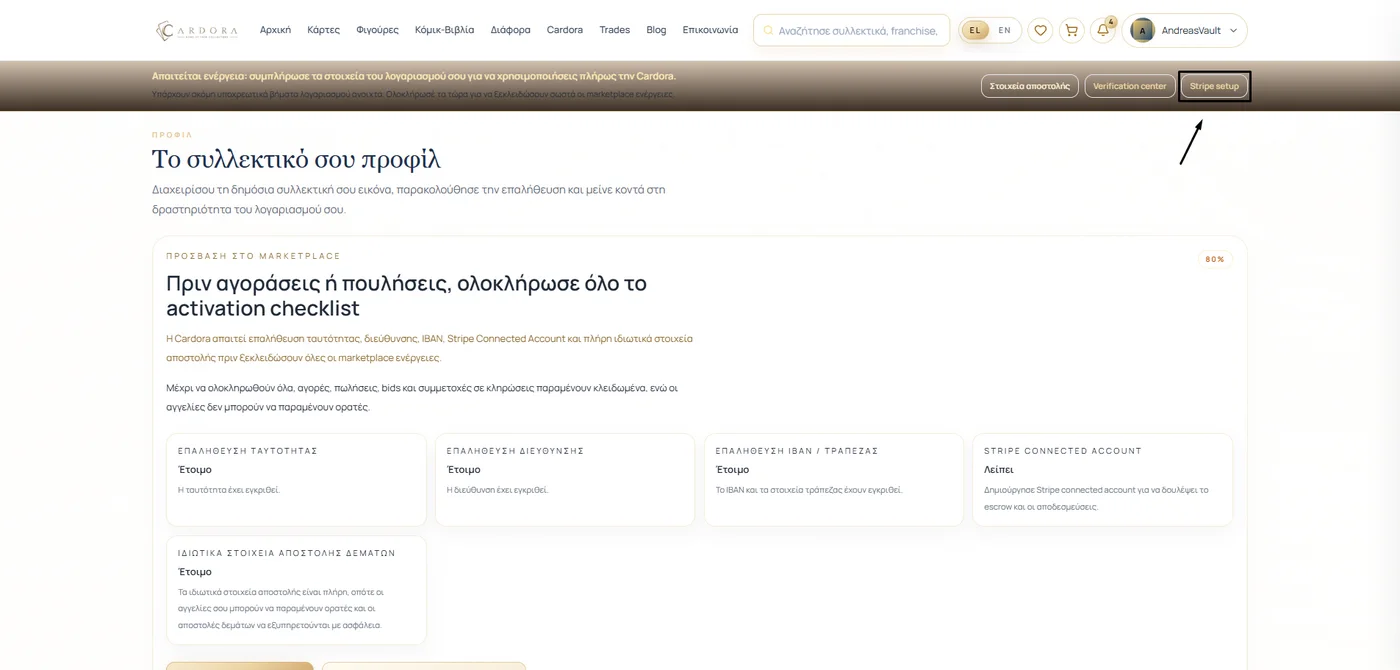
Open Stripe setup from your profile
What to do
On your profile page, find the Stripe setup button at the top right and click it. This opens the area where you connect your account to Stripe so you can receive payments as a seller.
Step 02
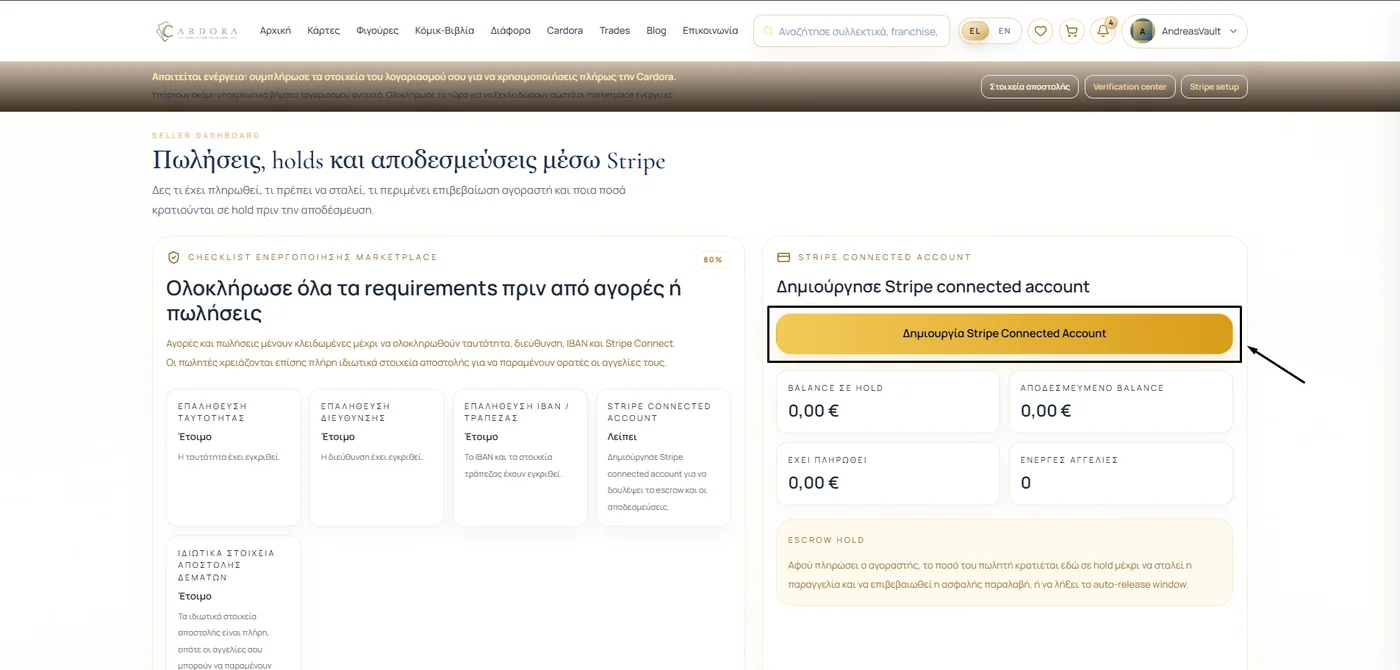
Start creating your Stripe Connected Account
What to do
In the Seller Dashboard, click Create Stripe Connected Account. You will be taken to Stripe’s secure environment to complete the details required for payouts.
Step 03
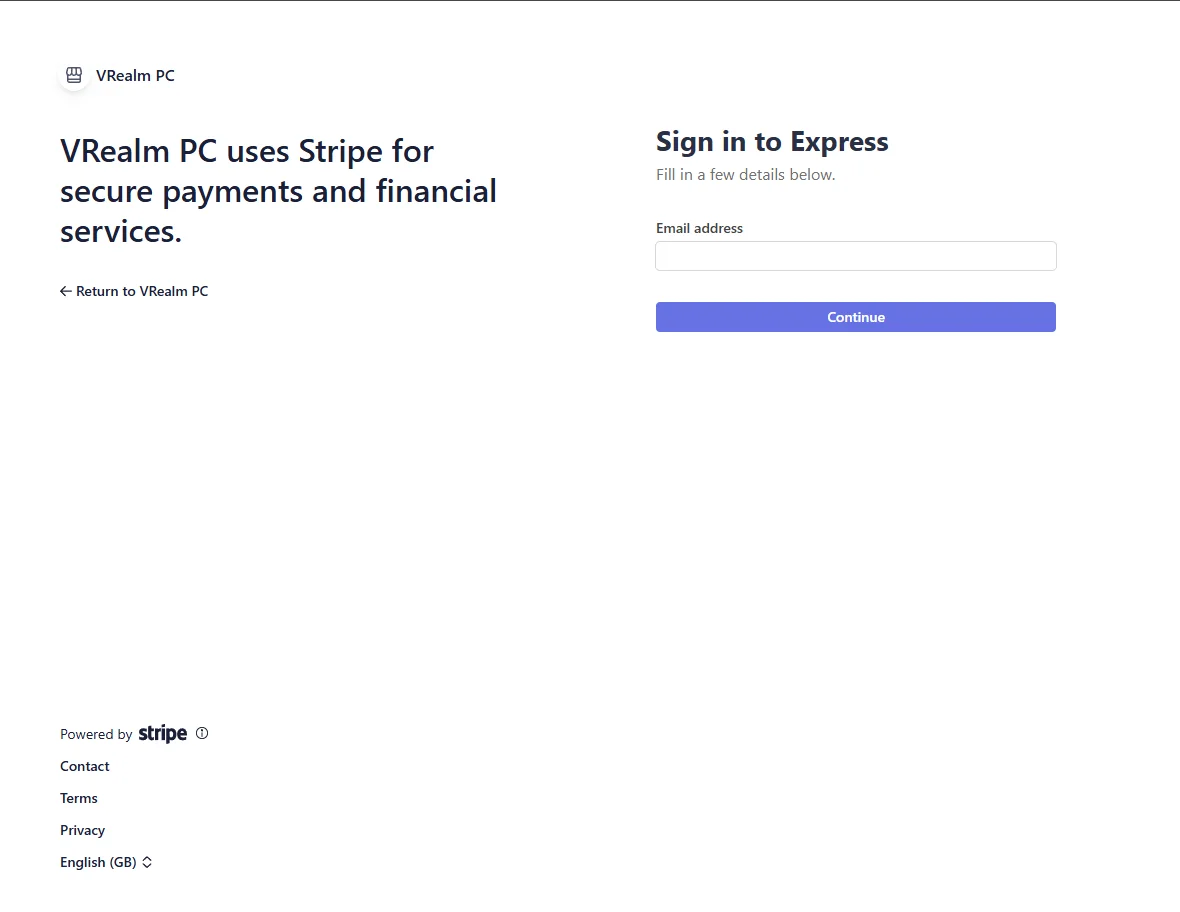
Sign in or get started with Stripe Express
What to do
On the Sign in to Express page, enter the email you want to use for Stripe Express and click Continue. If an account already exists with that email, Stripe will guide you through signing in.
Step 04
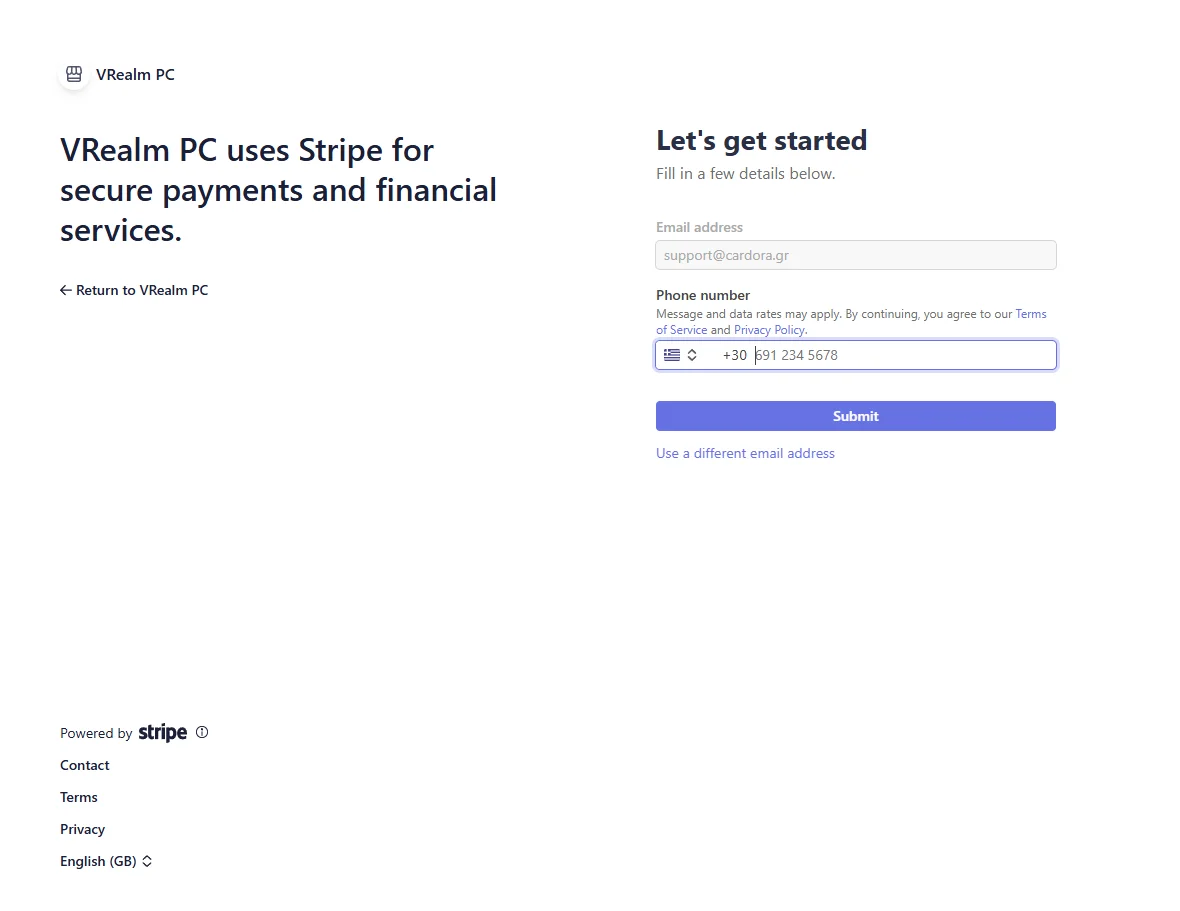
Confirm your email and mobile number
What to do
Check that the email is correct, enter your mobile number and click Submit. Use a number you have with you, because a verification code will be sent in the next step.
Step 05
Enter the code you receive by SMS
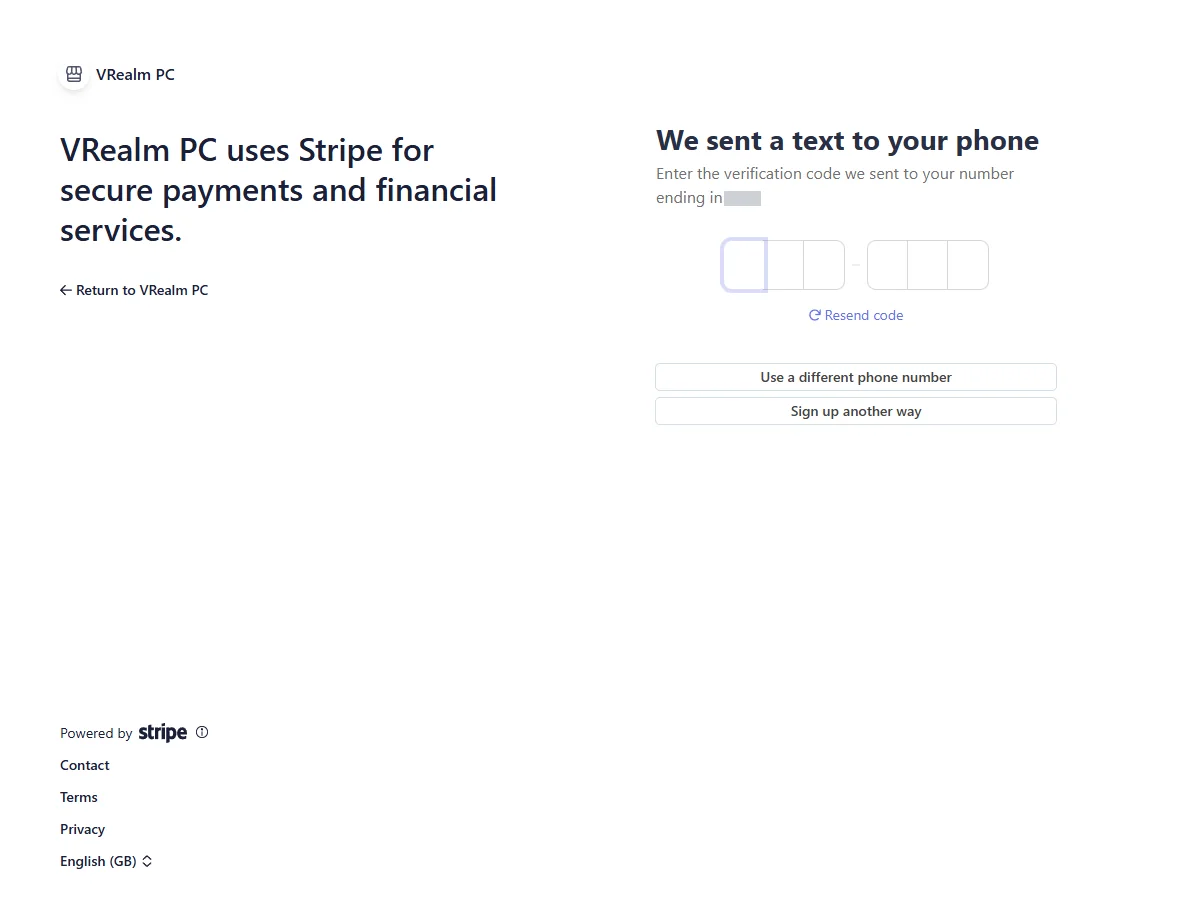
What to do
Type the verification code Stripe sent to your phone. If you do not receive a message, use Resend code or choose a different phone number.
Step 06
Fill in your personal details
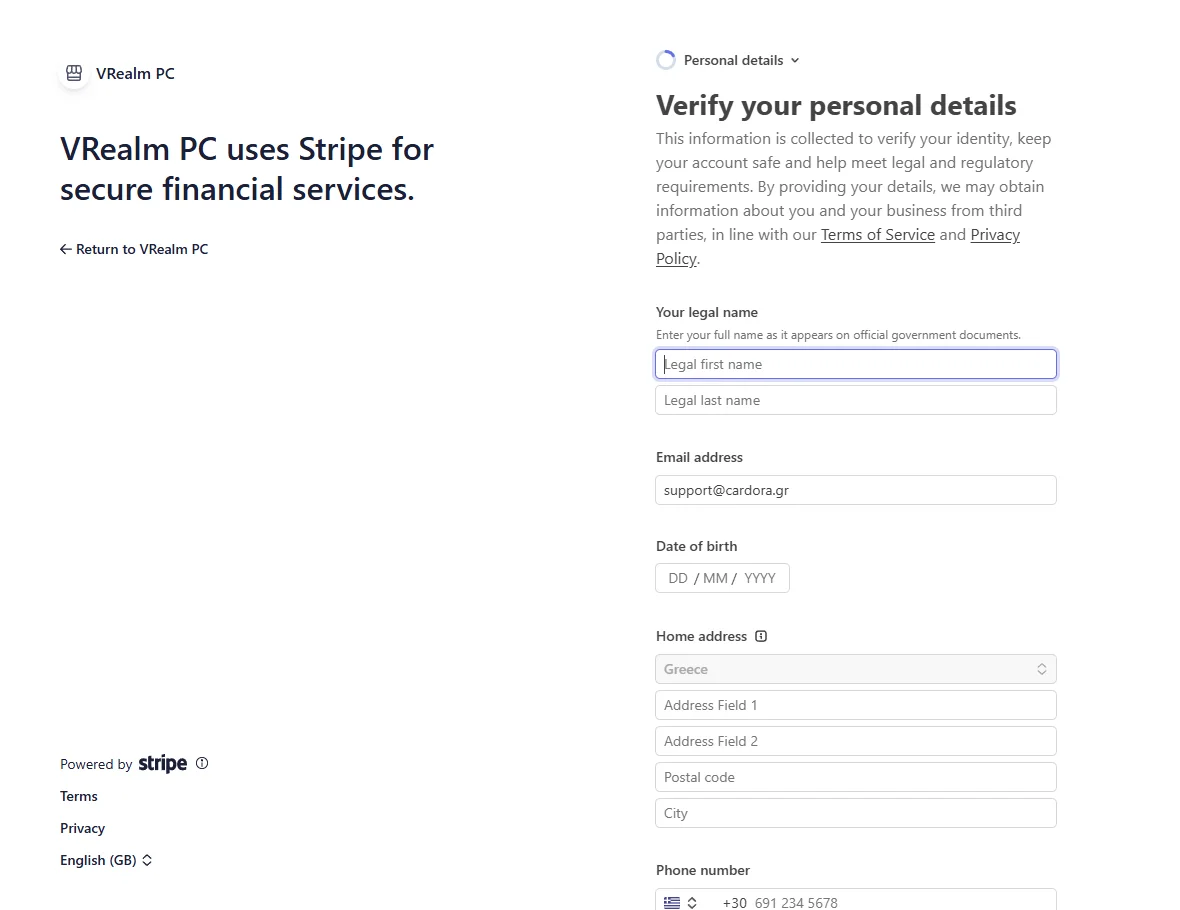
What to do
Enter your legal first and last name, date of birth, home address and phone number. The details must be accurate and match your official documents, because they are used to verify your identity.
Step 07
Complete identity verification when asked
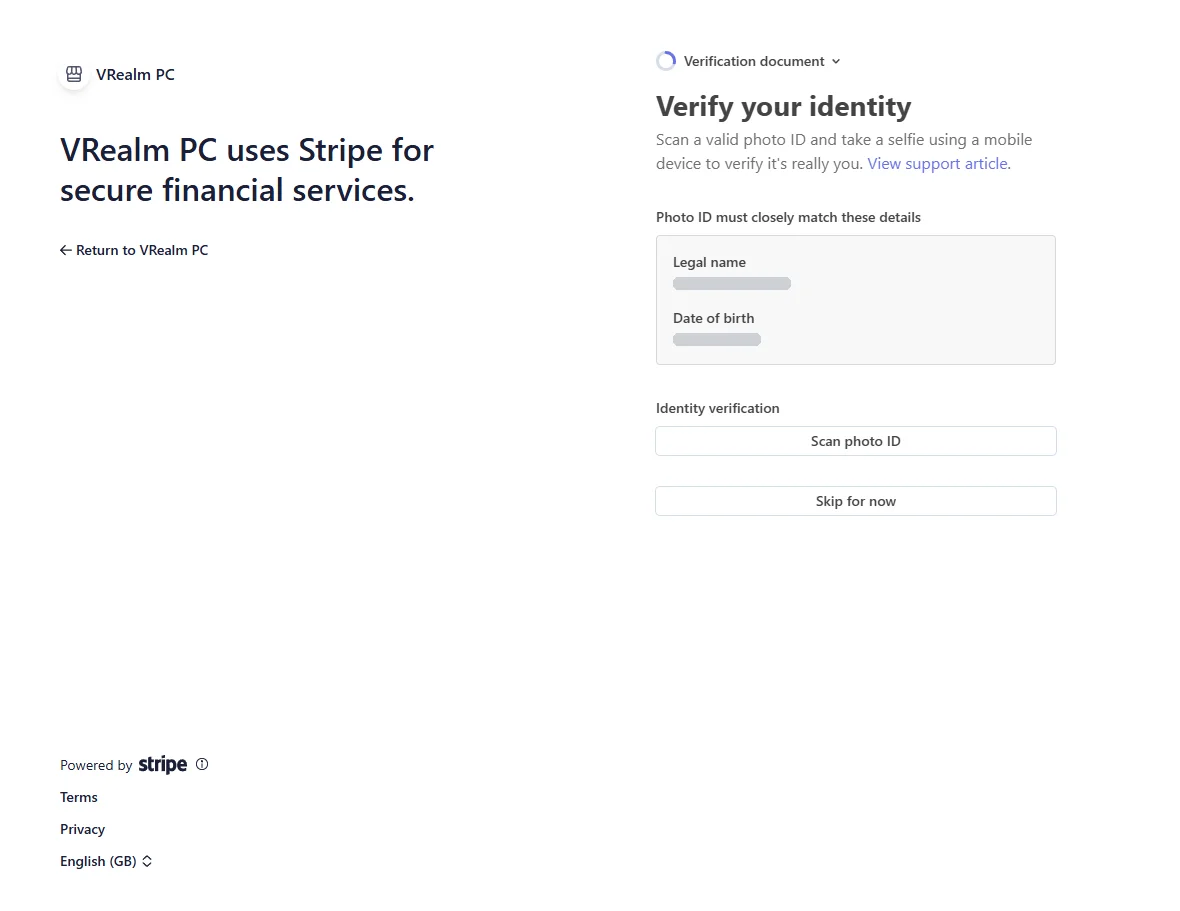
What to do
On Verify your identity, choose Scan photo ID and follow Stripe’s instructions on your phone to photograph your ID document and, where asked, take a selfie. The screen also offers Skip for now, but Stripe may require verification before payments or payouts are fully enabled.
Step 08
Provide your business details
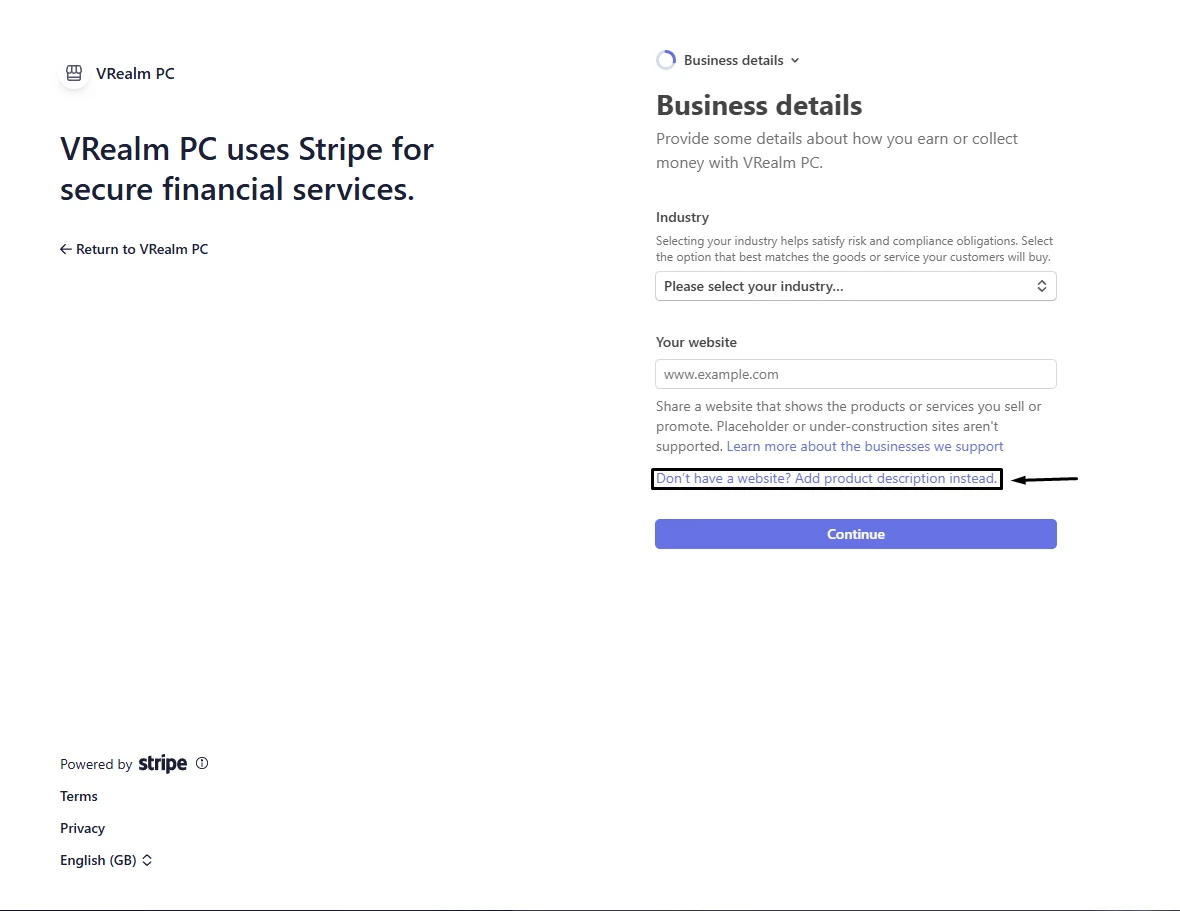
What to do
In the Business details section you need to state your industry and either a website or a description of the products or services you sell. If you do not have your own website, click the link Don’t have a website? Add product description instead.
Step 09
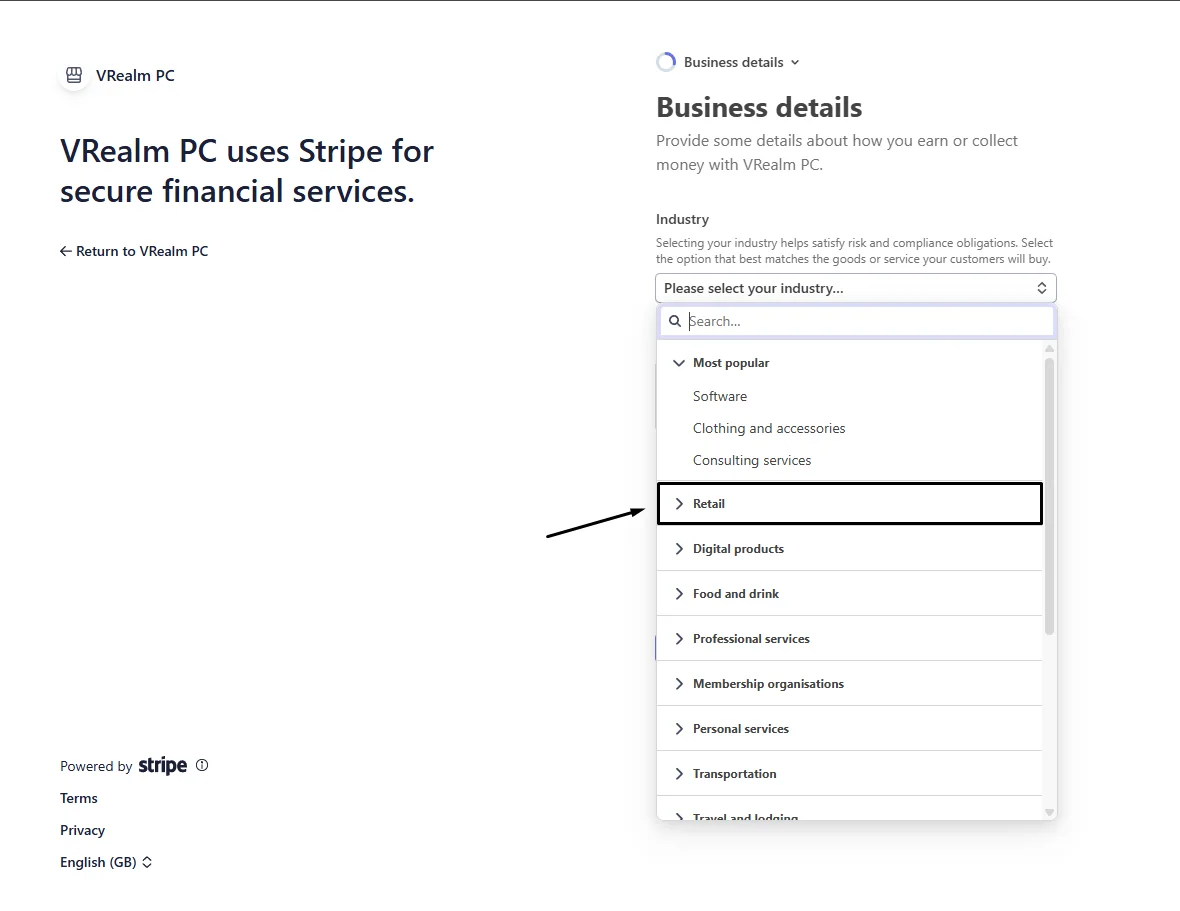
In Industry, choose the Retail category
What to do
Open the Industry field and choose the Retail category, as shown in the image. Your choice should describe your activity as accurately as possible.
Step 10
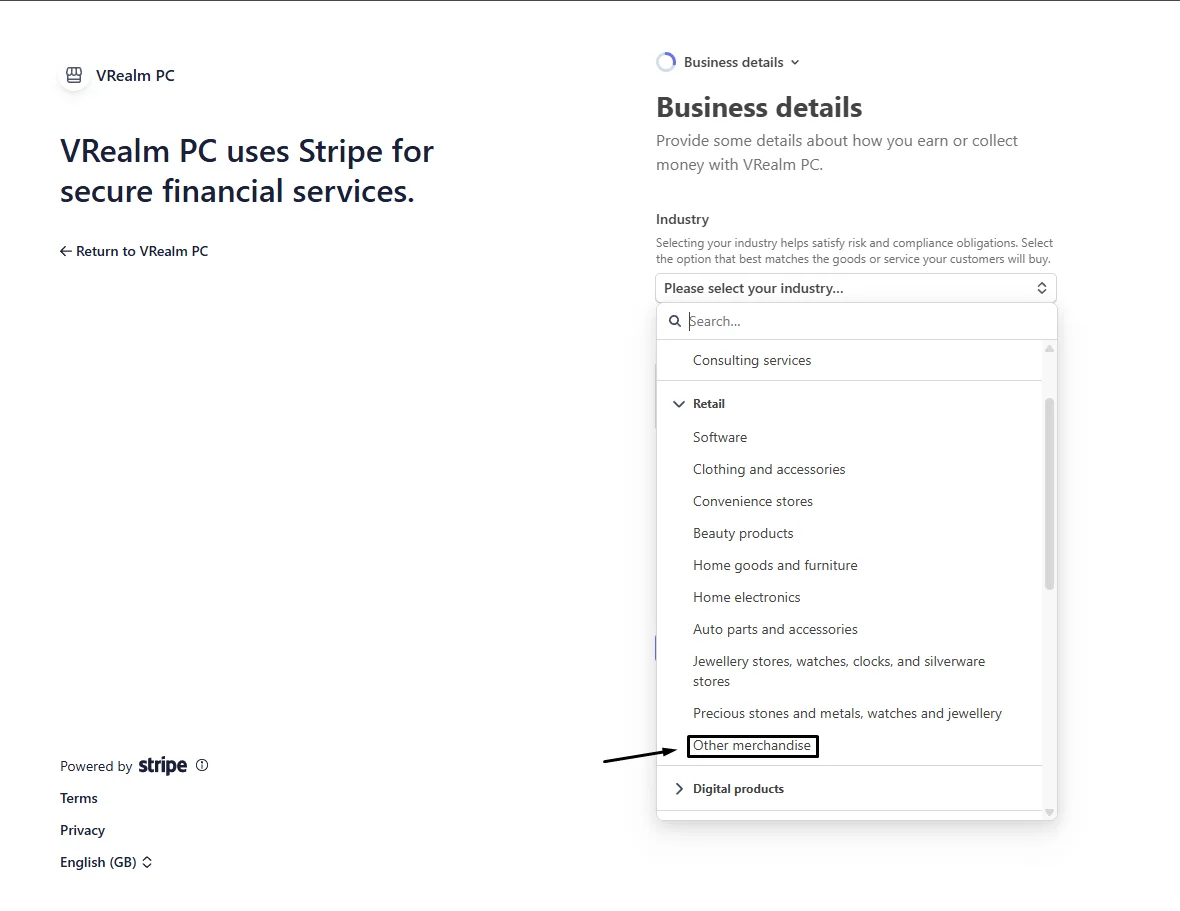
Choose Other merchandise
What to do
Inside the Retail category, choose Other merchandise. In this example it is used as a general category for selling collectible items.
Step 11
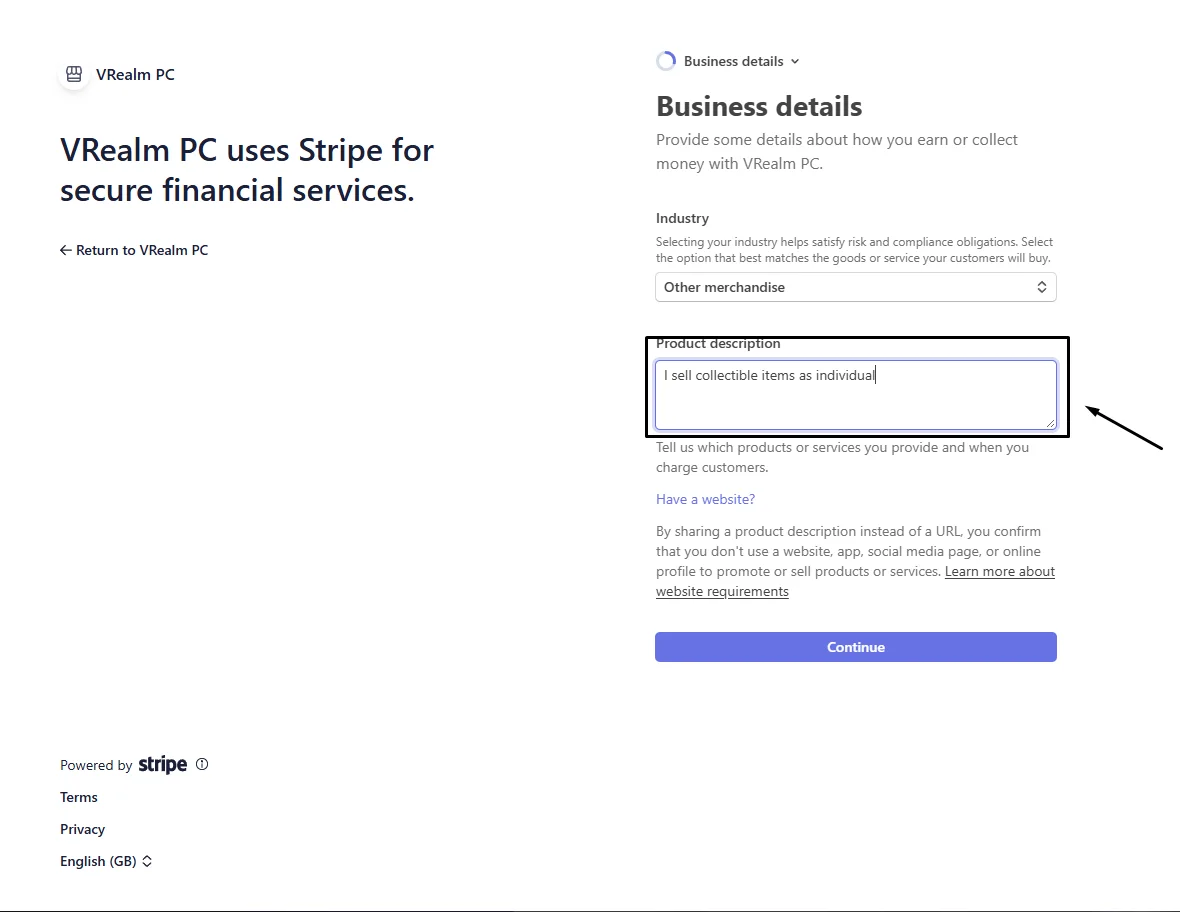
Write a short product description
What to do
In the Product description field, say in plain words what you sell. Example: “I sell collectible items as an individual.” Then click Continue. The description must match your real activity.
Step 12
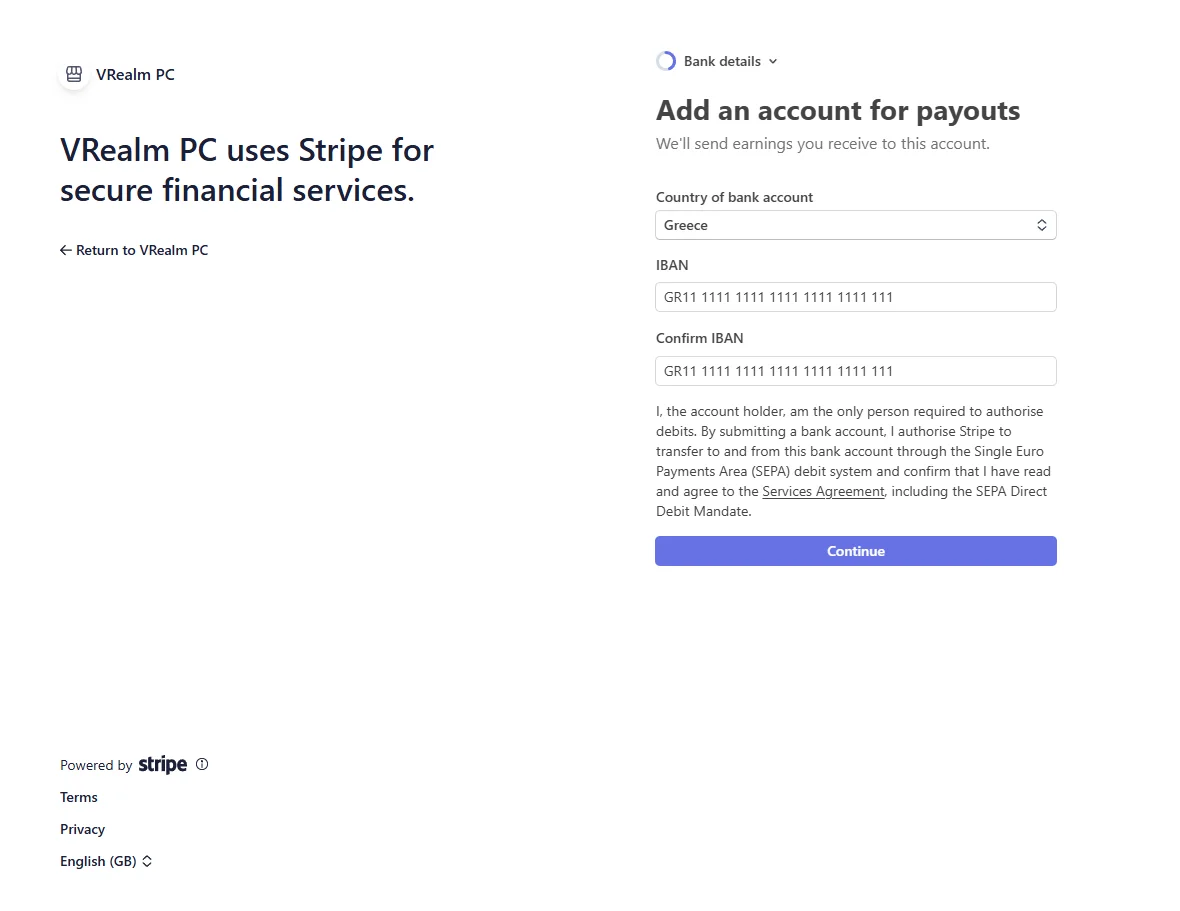
Add a bank account for payouts
What to do
In Add an account for payouts, check the country of the bank account, enter your IBAN and enter it again in Confirm IBAN. Use an account you are entitled to manage and double-check the IBAN before you click Continue.
Step 13
Review everything and submit
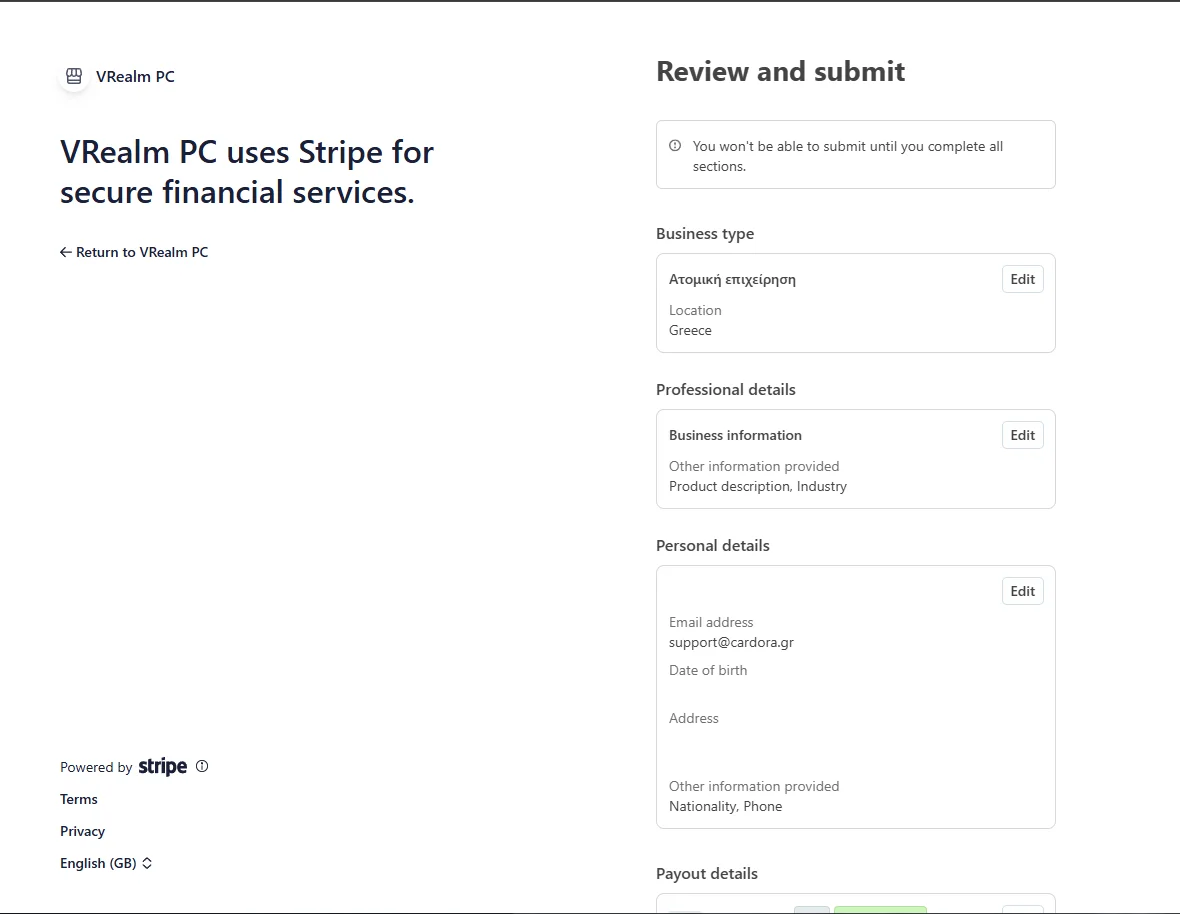
What to do
On the Review and submit page, check each section one by one: Business type, Professional details, Personal details and Payout details. If something is wrong, click Edit. Once every section is complete, go ahead with the final submission. Note: the example in the image shows a specific business type; you must declare the form that truly applies to you.
Good to know
Stripe screens may differ slightly depending on your country, account type and verification requirements. Screenshots come from a test account and personal details have been hidden.
Stuck on a step?
Our support team can help you finish onboarding and activate payouts.
Finished? Head back to your profile to check your Stripe status.